
Just completed a continuing education course? Achieve certification in your industry area? Welcome to the world of BadgeCert. Our company works with your verified issuing organization to recognize your achievements in a secure, portable form called a digital badge, or BadgeCert. They can be shared via social networking, email, and on your website.
If you received an email from a badge issuer with a URL like http://bcert.me/abcdef, you are eligible to share your BC portfolio with this unique shortened link. This link can be embedded into resumes, Outlook Signature, LinkedIn Certification, Twitter, and Facebook. These sections will help you share your credential.
If you received an email from a badge issuer with login credentials and URL like http://bcert.me/abcdef you are eligible to login to the BC web portal to automatically share your credentials via Twitter, Facebook, LinkedIn, and via email. You still must manually embed this link into your Outlook signature.
Select “Login” in the top right corner at: http://badgecert.com/bc/html to use the BC web portal. Enter your email and the password provided in the email. If you forgot the password, select “Forgot password.” You will be asked to change your password. You can visit “Update Profile” to update your biography and picture.
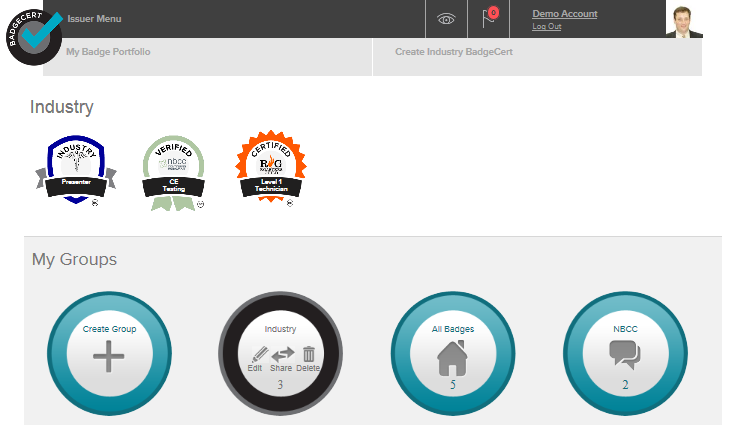
Groups provide logged in users the ability to group badges and selectively share them. As an example, you may have a separate group for professional accomplishments and another for volunteer work. Once you’ve earned a digital badge and you are logged in, you can permanently delete the badge by clicking the badge and selecting “x” delete. You can also create a group (the big circles) at the bottom of the page and drag and drop badges into groups. Click on the group to see the badges inside.
In order to share a group, right click the group circle to and select “Share.” To Share an individual badge, right click on the badge and select “Share” on the overlay – you will be whisked away to the Sharing Overlay.
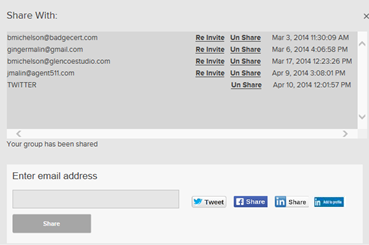
Once you’ve selected “Share” from either a single badge or a group while logged in, you can either enter an email address or click the icon in the overlay to share the group with an email recipient or via Twitter, Facebook, LinkedIn feed, or LinkedIn profile. Email recipients receive a URL link to click and verify your credentials. Select “Un Share” to deactivate the link (e.g. prospective employer). To share your badge(s) with each social network you must be logged in to the network (or you will be prompted to do so via pop-up). A customized message and URL link will be shown on each respective site you select. You can also email yourself a URL link that you can separately embed into your own website or Outlook signature.
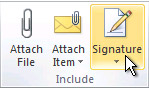
Add your BC portfolio to your Outlook signature using your URL link. The link is obtained in your BC issuance email, by sending the sharing email to yourself, or on the profile itself. It looks like http://bcert.me/abdef. Configuring Outlook, depending on the version, may take a little maneuvering.
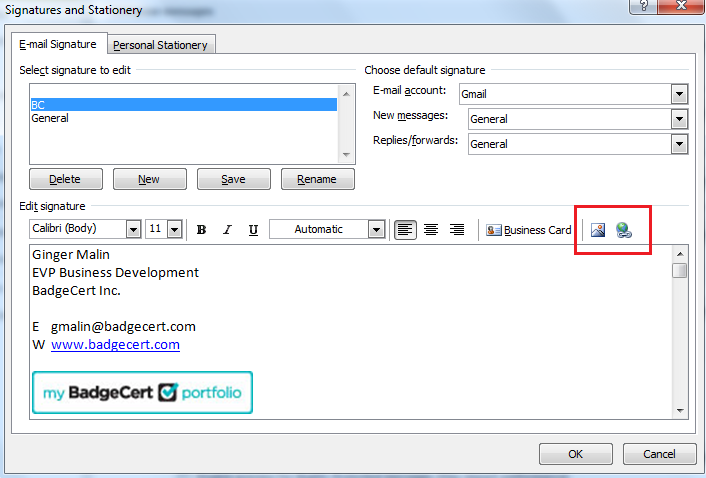
To add a picture in the signature, check with the issuing organization for any artwork they may have created, or select “save as” picture on the badge in the URL link. Do not download badges from the web portal. Lastly, BC offers a couple of images you may wish to download from the website:

Use this method if you have a URL link only and do not login to the BC web portal.
Use this method if you have a URL link only and do not login to the BC web portal.
To add a picture in the signature, check with the issuing organization for any artwork they may have created, or select “save as” picture on the badge in the URL link. Do not download badges from the web portal.
Login to your Twitter account and click “Compose new Tweet” on the right hand side of the menu as shown below. In the Compose New Tweet box, create a message that tells your followers about your new BadgeCert such as “I just received a new credential!” Add your URL link and Add photo and browse to the logo or portfolio artwork you just saved. Then click “Tweet.”
Use this method if you have a URL link only and do not login to the BC web portal.
To add a picture in the signature, check with the issuing organization for any artwork they may have created, or select “save as” picture on the badge in the URL link. Do not download badges from the web portal.
Login to your Facebook account and from “Timeline,” select “Life Event.” Then Select “Work & Education” and “Create Your Own…” at the bottom of the list. Add title such as “I earned a new certificate!” Select “Upload Photos” and browse the image you identified earlier.
Under the “Story” tab, add the link to your live portfolio by typing the words “Follow this link to see my credential” and insert your URL link. Finally, choose the people you would like to share your accomplishment with (public, friends, only me) and click “Save.”

© by BadgeCert. All Rights Reserved

